How to Rehydrate Dried Vanilla Beans: Expert Tips
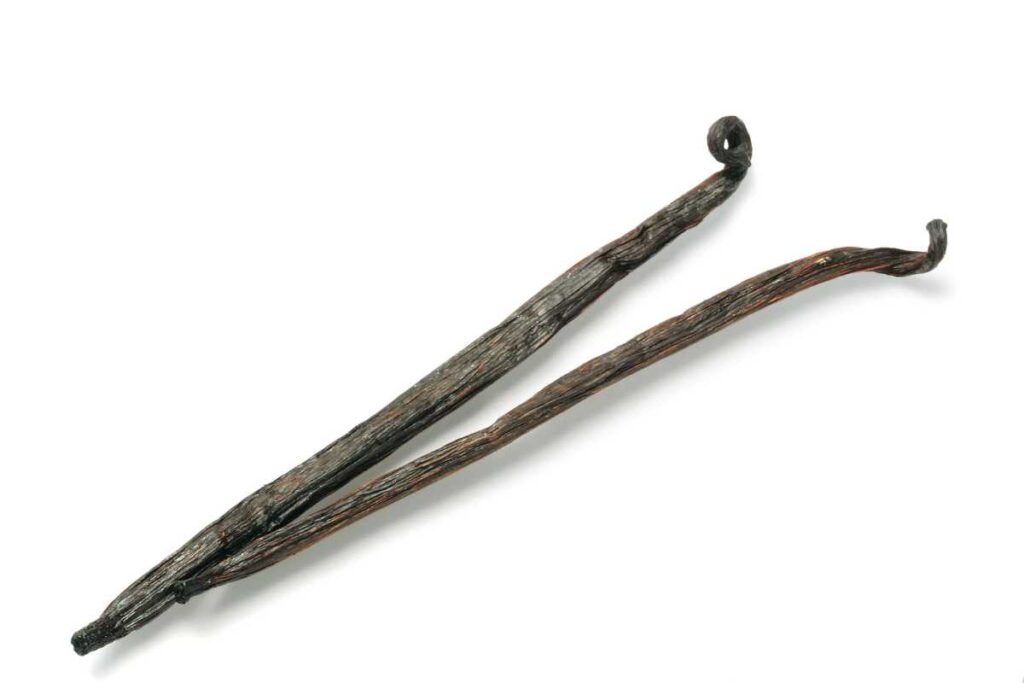
Rehydrating dried vanilla beans is a crucial step in unlocking their full flavor potential. Dried vanilla beans are dehydrated to preserve their shelf life, but this process also removes much of their moisture and flavor. Skipping the rehydration step can result in lackluster vanilla flavor and a less-than-ideal texture in your finished product.

But fear not! You can easily rehydrate dried vanilla beans to restore their plumpness and intense aroma. Soaking them in warm water or alcohol allows the beans to absorb liquid and regain their moisture content.
Properly rehydrated vanilla beans will have a more intense aroma and flavor, making them ideal for use in baking, cooking, and even homemade vanilla extract. The rehydration process also helps to soften the tough outer skin of the bean, making it easier to split open and scrape out the flavorful seeds inside.
Recipe Cost Reducer
Commercial Bakery & Wholesale
Bean count reduction calculated based on vanillin potency ratio (1.8% vs 3.54%) to maintain identical flavor intensity.
To rehydrate dried vanilla beans, start by selecting high-quality beans that are still pliable. Avoid any that are hard or brittle as they may be too old or low quality. Then, simply place the desired number of beans into a bowl or jar and cover with warm water or alcohol (such as vodka). Allow them to soak for at least 30 minutes, but up to several hours for optimal results.
Creaminess ROI Calculator
Ice Cream & Gelato Makers
See how much more flavor intensity you get for the same budget.
$16.67
$4.94
Higher Vanillin Load (mg/L) is required in high-fat mixes (14%+) to ensure flavor perception.
Once they are fully rehydrated, remove the beans from the liquid and gently pat dry with a paper towel before using as desired. If you don’t plan on using all of your rehydrated beans right away, store them in an airtight container in the refrigerator for up to several weeks.
Benefits of plumping up dried vanilla beans
Enhancing the Flavor and Aroma of Dried Vanilla Beans
Plumping up dried vanilla beans is a game-changer they lose their moisture content and become hard and brittle. However, rehydrating them can bring back their pliability, making them easier to work with in the kitchen.
Soaking dried vanilla beans in hot water or alcohol is an excellent way to plump them up. The heat from the liquid helps soften the bean’s outer layer, allowing it to absorb moisture. Once the vanilla bean has been rehydrated, its flavor profile becomes more pronounced, making it perfect for use in recipes that call for a strong vanilla taste.
Using Plumped Up Vanilla Beans in Recipes
Rehydrated vanilla beans can be used in a variety of recipes, including baked goods, ice cream, sauces, and more. Whether you’re making homemade cookies or crafting a delicious sauce for your steak dinner, using plumped up vanilla beans will take your dish to the next level.

One popular way to use rehydrated vanilla beans is by making homemade vanilla extract. Simply soak several plumped up vanilla beans in high-proof alcohol like vodka or bourbon for several weeks until the mixture turns dark brown. The result is a flavorful extract that can be used in many different recipes.
Getting More Out of Your Ingredients
Using rehydrated vanilla beans is an excellent way to get more out of your ingredients while creating more flavorful dishes. It’s no secret that fresh ingredients are always better than stale ones; however, sometimes we don’t have access to fresh produce all year round. By learning how to plump up dried vanilla beans, you can still enjoy their rich flavor even when they’re not fresh off the tree.
How to revive dried-out vanilla beans using water
Soak Dried Vanilla Beans in Warm Water for 15-20 Minutes
Vanilla beans are an essential ingredient in many recipes, but sometimes they can dry out and become hard. If you find yourself with dried-out vanilla beans, don’t worry! You can revive them using water. Soaking the beans in warm water will help to soften them up and make them pliable again.
To start, place your dried vanilla beans in a bowl or cup and cover them completely with warm water. The water should be warm but not boiling hot, as this could damage the fragile beans. Let the beans soak for 15-20 minutes, or until they have absorbed enough water to become soft.
Make Sure the Water Covers the Beans Completely
When soaking your dried vanilla beans in water, it’s important to ensure that they are fully submerged. This will help them to absorb as much moisture as possible and become plump and juicy once again.

Gently Massage the Beans to Help Them Absorb Water
While your vanilla beans are soaking in warm water, you can gently massage them to help speed up the absorption process. Gently rubbing the surface of each bean will encourage it to take on more moisture from the surrounding liquid.
After Soaking, Pat the Beans Dry with a Paper Towel
Once your dried vanilla beans have soaked long enough and feel soft to the touch, remove them from the bowl of water and pat dry with a paper towel. This will remove any excess moisture on their surface and prepare them for use in your recipe.
Revived Vanilla Beans Can Be Used in Recipes Just Like Fresh Ones
Now that your dried-out vanilla beans have been revived with a soak in warm water, you can use them just like fresh ones! Simply slice open each bean lengthwise and scrape out its fragrant seeds with a sharp knife or spoon. These seeds can be added directly to recipes like custards, ice cream bases, and baked goods to infuse them with delicious vanilla flavor.

Soaking dried vanilla beans in alcohol for extract making
Making homemade vanilla extract is a great way to elevate your baking and cooking game. One of the first steps in creating this delicious ingredient is soaking dried vanilla beans in alcohol. In this section, we’ll discuss the ins and outs of soaking dried vanilla beans in alcohol for extract making.
Choosing the Right Alcohol
Vodka is the most commonly used option due to its neutral flavor profile. Other alcohols can be used, but they may impart their own flavors onto the final product. Vodka ensures that the vanilla flavor shines through without any interference from other flavors.
Ratio of Dried Vanilla Beans to Alcohol
The ratio of dried vanilla beans to alcohol can vary depending on personal preference, but a common ratio is 1:1 or 1:2. This means using one or two cups of alcohol per cup of dried vanilla beans. The more beans you use, the stronger and richer the final product will be.
Allowing Time for Infusion
Once you’ve combined your dried vanilla beans and vodka, it’s important to let them sit together for at least six weeks before using the extract. This allows time for the flavors to fully infuse into the alcohol and create a rich, flavorful extract that can be used in all kinds of recipes.
Tips for baking with rehydrated vanilla beans
Soak and Scrape: Maximizing Flavor with Rehydrated Vanilla Beans
Rehydrating dried vanilla beans is a simple process that can add an extra layer of flavor to your baked goods. By soaking the beans in hot water, you can extract the rich aroma and taste of vanilla that can elevate your desserts to new heights. Here are some tips for baking with rehydrated vanilla beans.
Soak the Dried Vanilla Beans
Before using them in baking, soak the dried vanilla beans in hot water for at least 15 minutes. This will help to soften the beans and release their full flavor potential. Once soaked, remove the beans from the water and pat them dry with a paper towel.
Scrape the Seeds
To get maximum flavor from your rehydrated vanilla beans, scrape out the seeds and use them in your recipe. Simply cut open each bean lengthwise and use a spoon or knife to scrape out the tiny black seeds inside. These seeds contain all of the aromatic oils that give vanilla its distinctive flavor profile.
Use Proper Ratio
When substituting rehydrated vanilla beans for extract in a recipe, use a ratio of one bean per teaspoon of extract called for in the recipe. For example, if a recipe calls for two teaspoons of vanilla extract, you would need two rehydrated vanilla beans.
Store Leftover Rehydrated Vanilla Beans
If you have leftover rehydrated vanilla beans after using them in a recipe, store them in an airtight container in the refrigerator for up to two weeks. This will help to preserve their freshness so that they can be used again later.
Add Rehydrated Vanilla Beans Early On
When adding rehydrated vanilla beans to your baked goods, it’s important to add them early on so that they have time to infuse into the other ingredients. Add them along with any liquid ingredients such as milk or cream to ensure even distribution of flavor throughout your recipe.
Experiment with Different Baked Goods
Rehydrated vanilla beans can be used in a variety of baked goods, from cookies and cakes to custards and ice cream. Experiment with different recipes to find your favorite way to use them. You may find that they add a subtle depth of flavor that you never knew was missing before.
Baking with rehydrated vanilla beans is an easy way to take your desserts to the next level. By following these tips, you can maximize the flavor potential of these tiny but mighty beans. So go ahead and soak, scrape, and savor the rich aroma and taste of vanilla in all your baked creations!
Using a pressure cooker to rehydrate vanilla beans quickly
Boiling water and one minute of cooking time: The magic of pressure cooking to rehydrate vanilla beans
Vanilla beans are a crucial ingredient in many recipes, especially desserts. However, using dried vanilla beans can be challenging as they tend to be hard and difficult to work with. Fortunately, there is a quick solution to this problem: pressure cooking. By using a pressure cooker, you can rehydrate dried vanilla beans in just a few minutes.
The process is straightforward. First, you need to add boiling water to the pressure cooker along with the dried vanilla beans. You should use enough water to cover the beans completely. Then, set the pressure cooker for one minute of cooking time. After one minute, release the pressure and remove the vanilla beans from the cooker.
The result is fully rehydrated vanilla beans that are soft and pliable. Using a pressure cooker saves you time and ensures that your vanilla beans are ready for use in your recipe.
Why does it work?
Pressure cooking works by creating an environment where water boils at a higher temperature than normal atmospheric boiling point (100°C or 212°F). This increased temperature helps break down the cell walls of the dried vanilla bean quickly, allowing it to absorb water more efficiently.
Moreover, by using a pressure cooker instead of traditional methods such as soaking or simmering on low heat, you can save hours of waiting time and achieve consistent results every time.
Tips for using rehydrated vanilla beans
Once you have rehydrated your vanilla beans using a pressure cooker, there are several ways you can use them:
-
Scrape out the seeds: To extract maximum flavor from your rehydrated vanilla bean, scrape out its seeds with a sharp knife or spoon.
-
Make homemade extract: You can make your own homemade vanilla extract by steeping rehydrated vanilla beans in alcohol such as vodka or rum.
-
Use in baking: Rehydrated vanilla beans are perfect for baking. You can use them in recipes that call for vanilla extract or vanilla bean paste.
Storing and preserving rehydrated vanilla beans properly
Wrap rehydrated vanilla beans tightly with plastic wrap
Once you have rehydrated your vanilla beans, it is important to store them properly to maintain their flavor and quality. One of the best ways to do this is by wrapping them tightly with plastic wrap. This will help prevent air from getting in and drying out the beans.
When wrapping the vanilla beans, make sure they are completely dry. If there is any moisture left on the surface, it can lead to mold growth. Once wrapped, place the beans in an airtight container to further protect them from air exposure.
Store wrapped vanilla beans in an airtight container
After wrapping your rehydrated vanilla beans with plastic wrap, the next step is to store them in an airtight container. This will provide an additional layer of protection against air exposure and help keep the beans fresh for longer.
Choose a container that fits all of your wrapped vanilla beans without leaving too much empty space inside. The less air there is in the container, the better. Glass jars or food-grade plastic containers work well for storing vanilla beans.
Keep the container in a cool, dry place away from direct sunlight
Vanilla beans should be stored in a cool, dry place away from direct sunlight. Exposure to heat and light can cause them to lose flavor and aroma quickly.
A pantry or cupboard that is away from any sources of heat or light is an ideal storage location for your rehydrated vanilla beans. Avoid storing them near appliances such as ovens or stovetops that emit heat.
Avoid storing vanilla beans near strong-smelling foods as they can absorb odors easily
Vanilla beans have a delicate flavor and aroma that can be easily affected by other strong-smelling foods nearby. To avoid this, it’s best not to store them near onions, garlic, spices or anything else with a strong odor.
If you must store other items nearby, consider placing some activated charcoal or baking soda in the container with the vanilla beans. These can help absorb any unwanted odors and keep the beans smelling fresh.
Check on the beans regularly and discard any that show signs of mold or spoilage
It’s important to check on your rehydrated vanilla beans regularly to make sure they are still fresh and haven’t spoiled. Look for any signs of mold growth, discoloration, or a musty odor.
If you notice any of these signs, discard the affected bean immediately. Mold can spread quickly and contaminate other beans in the container if left unchecked.
Properly stored rehydrated vanilla beans can last for several months
When stored properly, rehydrated vanilla beans can last for several months. However, it’s best to use them within six months for optimal flavor and aroma.
By wrapping them tightly with plastic wrap, storing them in an airtight container, keeping them away from heat and light sources, avoiding strong-smelling foods nearby, checking on them regularly, and discarding any that show signs of spoilage or mold growth, you can enjoy the rich flavor of vanilla in your recipes for months to come.
Making vanilla sugar and salt with rehydrated vanilla beans
Rehydrating Dried Vanilla Beans for Homemade Vanilla Sugar and Salt
Vanilla is one of the most popular flavors in the world, used in everything from baked goods to ice cream. But did you know that you can make your own homemade vanilla sugar and salt using rehydrated dried vanilla beans? It’s a simple process that yields delicious results.
Rehydrating the Dried Vanilla Beans
The first step in making homemade vanilla sugar and salt is to rehydrate the dried vanilla beans. This is done by soaking them in warm water for a few minutes until they become plump and soft. Once they are rehydrated, split the beans lengthwise with a sharp knife and scrape out the seeds from inside.
Making Homemade Vanilla Sugar
To make homemade vanilla sugar, mix the scraped-out seeds with granulated sugar. The ratio of seeds to sugar can vary depending on how strong you want the flavor to be, but a good starting point is 1-2 tablespoons of seeds per cup of sugar. Mix well and let it sit for a few days to allow the flavor to infuse into the sugar.
Homemade vanilla sugar can be used in any recipe that calls for regular granulated sugar, adding a subtle but delicious hint of vanilla flavor. Use it in baked goods like cookies or cakes, sprinkle it over fresh fruit or yogurt, or stir it into your morning coffee or tea.
Making Homemade Vanilla Salt
If you prefer savory flavors, try making homemade vanilla salt instead. To do this, grind up rehydrated dried vanilla beans into a fine powder using a spice grinder or mortar and pestle. Mix this powder with coarse sea salt at a ratio of about 1 tablespoon of powder per 1/4 cup of salt.
Homemade vanilla salt adds an unexpected twist to savory dishes like roasted vegetables or grilled meats. Sprinkle it over popcorn or potato chips for a gourmet snack, or use it as a finishing salt for a fancy dinner party.
Creative ways to use plumped-up vanilla beans in recipes
Soaked and Plumped: Creative Ways to Use Vanilla Beans in Recipes
Vanilla beans are a versatile ingredient that can add flavor and aroma to a variety of dishes. One way to enhance their flavor is by plumping them up through soaking in warm water or alcohol. This process releases the vanilla’s natural oils, making it more potent and flavorful. Here are some creative ways to use plumped-up vanilla beans in your recipes.
Making Vanilla Extract
Vanilla extract is an essential ingredient in many dessert recipes, from cakes and cookies to ice cream. Making your own vanilla extract with plumped-up vanilla beans is easy and cost-effective. Simply soak the beans in vodka or another high-proof alcohol for several weeks, strain out the liquid, and store it in a dark bottle. The resulting extract will have a rich, complex flavor that far surpasses store-bought versions.
Infusing Flavor into Liquids
Plumped-up vanilla beans can also be used to infuse flavor into liquids such as milk, cream, or syrup. Heat the liquid gently with the bean inside until it reaches a simmer, then remove from heat and let steep for at least 30 minutes before straining out the bean. The resulting liquid can be used in various desserts or drinks such as coffee or tea.
Adding Sweetness to Savory Dishes
While vanilla is often associated with sweet dishes, its subtle sweetness can also enhance savory flavors when used sparingly. Add plumped-up vanilla beans to roasted vegetables for a unique twist on classic side dishes or use them as a rub for grilled meats like chicken or pork.
Homemade Vanilla Sugar
Another way to utilize plumped-up vanilla beans is by making homemade vanilla sugar. Simply bury one or two plumped-up beans in granulated sugar for several days until the sugar has taken on the bean’s aroma and flavor. The resulting sugar can be used as a sweetener for coffee or tea or added to baked goods for a subtle vanilla flavor.
Enjoy the rich flavor of revived vanilla beans in your cooking and baking
Enjoy the rich flavor of revived vanilla beans in your cooking and baking. With just a few simple steps, you can transform dry, brittle vanilla beans into plump, fragrant pods bursting with flavor. Whether you’re making homemade vanilla extract or adding depth to your favorite baked goods, rehydrated vanilla beans are a must-have ingredient for any kitchen.
To plump up dried vanilla beans, start by soaking them in warm water for 10-15 minutes. This will help to soften the pods and release their aromatic oils. For an even more intense flavor, try soaking the beans in alcohol instead. Simply submerge the pods in vodka or rum for several weeks until the liquid turns dark brown and fragrant.
Once your vanilla beans are rehydrated, they’re ready to use in all sorts of recipes. Try scraping out the seeds and adding them to custards, ice creams, or whipped cream for a decadent twist on classic desserts. Or chop up the pods and mix them into pancake batter or cookie dough for a subtle yet complex flavor.
If you’re looking to take your baking game to the next level, try using a pressure cooker to rehydrate your vanilla beans quickly. Simply place the dried pods in a heat-proof container with some water and cook under high pressure for 5-10 minutes. The result is perfectly plumped-up beans that are ready to use right away.
It’s important to keep them fresh and fragrant for as long as possible. Store them in an airtight container at room temperature away from direct sunlight or moisture. You can also make homemade vanilla sugar or salt by burying used bean pods in sugar or salt overnight – this will infuse the sweetener with rich vanilla flavor that’s perfect for sprinkling on top of pastries or meats.