How to Make Vanilla Yogurt: Easy Homemade Recipe
Love the creamy goodness of pasteurized milk? Ever wondered how you can make your own homemade vanilla yogurt recipe using fresh fruit as an ingredient? Get ready to embark on a delightful journey of creating your very own homemade vanilla yogurt.

Say goodbye to store-bought pasteurized milk options packed with additives and hello to a healthier, more cost-effective homemade vanilla yogurt recipe. By making your own batch of homemade vanilla yogurt with a variety of fresh fruit, you have full control over the ingredients, ensuring freshness and quality every time.
But don’t worry, making homemade vanilla yogurt is not complicated. With just a few simple steps and some common kitchen tools like an instant pot or dutch oven, you can create a delicious recipe. Plus, you can easily customize it by adding fruits, honey, or even granola to suit your taste preferences.
So why wait? Let’s dive into the world of homemade vanilla yogurt recipe and discover the joy of crafting this delectable breakfast treat right in your own kitchen using fresh fruit. Get your yogurt starter ready and let’s get started with the dutch oven!
Essential ingredients for easy vanilla yogurt recipe
Making your own velvety smooth and flavorful vanilla yogurt is easier than you might think with this homemade recipe. By using a few essential ingredients and a dutch oven, you can create a delicious breakfast treat that surpasses anything you’ll find in stores. Let’s dive into the key components that make this cooler dish truly exceptional.
High-Quality Milk
To make a delicious yogurt recipe, start with high-quality milk, such as whole milk. The fat content in whole milk contributes to a rich and creamy texture. However, if you prefer a lighter option for your breakfast, you can use low-fat or skim milk. Just keep in mind that it may result in a thinner consistency.

Starter Culture
To transform milk into yogurt, you need to introduce live bacteria cultures, also known as starter culture. These cultures kickstart the fermentation process, converting lactose (milk sugar) into lactic acid, which gives yogurt its tangy flavor and thick consistency. You can easily find starter culture at health food stores or use plain store-bought yogurt containing active cultures as a substitute in this breakfast recipe.
Vanilla Extract
The star ingredient that lends its delightful aroma and flavor to your homemade vanilla yogurt in a dutch oven is none other than vanilla extract. Be sure to use pure vanilla extract rather than artificial flavors for an authentic taste experience. The depth and warmth of real vanilla in a dutch oven will elevate your yogurt to new heights.
Alternative Sweeteners
While traditional recipes call for sugar as the sweetener in vanilla yogurt, there are alternative options available if you’re looking to reduce your sugar intake or experiment with different flavors. Consider using honey or maple syrup in your dutch oven as natural alternatives that bring their own unique taste profiles to the table. For those who prefer non-caloric sweeteners, stevia or monk fruit extracts can provide sweetness without added calories.
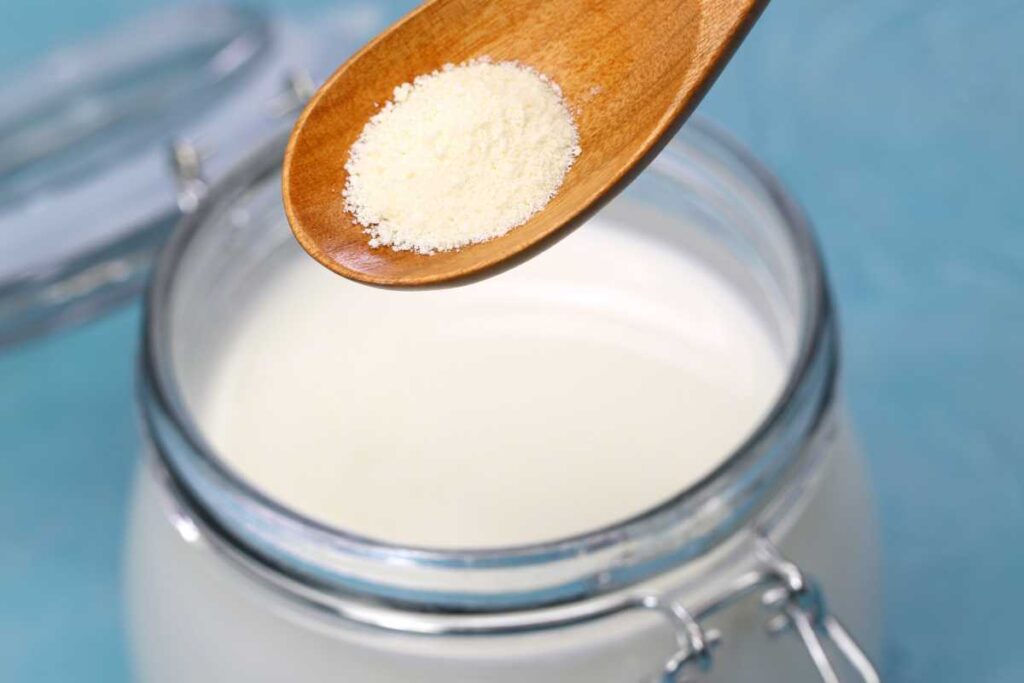
Thickeners
If you desire a thicker consistency in your homemade vanilla yogurt, there are various thickeners you can incorporate. Greek yogurt, known for its strained texture, can be used as a starter culture or added to the milk before fermentation. Another option is to use powdered milk, which enhances the creaminess and thickness of the final product. Tapioca starch or gelatin can be mixed in during preparation to achieve a more custard-like consistency. Additionally, using a dutch oven can help maintain a consistent temperature during the fermentation process.
By combining high-quality milk, starter culture, vanilla extract, alternative sweeteners, and thickeners in a dutch oven, you’ll have all the necessary components to create a delectable batch of homemade vanilla yogurt. Experiment with different ratios and flavors to find your perfect balance of sweetness and tanginess. Enjoy this nutritious treat on its own or use it as a base for smoothies, parfaits, or even frozen yogurt creations. The possibilities are endless when it comes to indulging in your very own homemade vanilla yogurt masterpiece!
Equipment needed for making vanilla yogurt at home
To successfully prepare homemade vanilla yogurt, it’s important to have the right tools at your disposal. With just a few essential pieces of equipment, you’ll be well on your way to creating delicious and creamy yogurt in the comfort of your own kitchen.
Thermometer: A crucial tool for precision
One of the most important tools you’ll need is a simple thermometer. Maintaining the correct temperature during the yogurt-making process is vital to ensure proper fermentation. By using a thermometer, you can monitor and control the temperature accurately, resulting in consistently perfect batches of vanilla yogurt every time.

Jars or containers: The vessels for your creation
Having suitable jars or containers, such as glass or food-grade plastic containers with tight-fitting lids, is another essential requirement for incubating your homemade yogurt. Opt for Mason jars, known for their simplicity and ability to retain heat effectively, to maintain optimal conditions for fermentation.
Heating source: Options aplenty
There are several options available:
-
Oven: If you prefer a traditional approach, utilizing your oven can be an excellent choice. Set it to its lowest temperature (usually around 100°F/38°C) and turn on the oven light. This gentle heat combined with the oven light will create an ideal environment for fermenting your vanilla yogurt.
-
Yogurt maker: For those seeking convenience and consistency, investing in a yogurt maker can simplify the process significantly. These appliances are specifically designed to maintain consistent temperatures necessary for perfecting homemade yogurt.
-
Instant Pot: If you already own an Instant Pot multi-cooker, rejoice! It can double up as a handy tool for making yogurt too. With its precise temperature controls and slow cooking function, an Instant Pot provides an effortless way to achieve creamy vanilla goodness.
Optional equipment: Adding convenience to your yogurt-making journey
While the above tools are essential, there are a few optional equipment choices that can enhance your yogurt-making experience:

-
Strainer: If you prefer a thicker consistency or want to make Greek-style yogurt, a strainer will come in handy. It helps separate the whey from the yogurt, resulting in a creamier texture.
-
Refrigerator: Once your vanilla yogurt is ready, storing it in the refrigerator is crucial to halt the fermentation process and maintain its freshness. Ensure you have enough space in your fridge for your containers.
By equipping yourself with these essential tools and optional equipment, you’ll be well-prepared to embark on your homemade vanilla yogurt adventure. Whether you choose to utilize a traditional oven or invest in specialized appliances like a yogurt maker or Instant Pot, making creamy and delicious vanilla yogurt at home has never been easier!
Step-by-step guide: How to make delicious vanilla yogurt
Crafting perfect homemade vanilla yogurt doesn’t have to be a daunting task. With our foolproof step-by-step instructions, you’ll be able to whip up a batch of creamy and flavorful yogurt every time. From heating the milk to incubating the mixture, we’ll guide you through each stage effortlessly. So let’s get started!
How to Make Vanilla Yogurt | Heating the Milk
The first step in making vanilla yogurt is heating the milk. Start by pouring your desired amount of milk into a saucepan and place it over medium heat. Stir occasionally to prevent scorching until the milk reaches a temperature of 180°F (82°C). Heating the milk helps kill any unwanted bacteria and ensures a smooth texture for your yogurt.
Cooling and Adding Starter Culture
Once the milk has reached 180°F (82°C), remove it from heat and allow it to cool down to around 110°F (43°C). This temperature range is crucial as it creates an ideal environment for the starter culture to thrive. The starter culture can be store-bought plain yogurt or a powdered starter specifically designed for making yogurt.
Once cooled, add about two tablespoons of plain yogurt per quart of milk or follow the instructions on your powdered starter package. Mix well to evenly distribute the culture throughout the milk.
Incubation Time
After adding the starter culture to the homemade vanilla yogurt recipe, it’s time to incubate the mixture. The goal is to maintain a warm environment that encourages bacterial fermentation of the plain yogurt. There are various methods you can use for incubation of the vanilla bean yogurt.
-
Instant Pot Yogurt Recipe:
-
Pour the mixture into clean glass jars.
-
Place the vanilla bean yogurt starter and plain yogurt in an Instant Pot with a cup of water to make a delicious homemade vanilla yogurt recipe.
-
Set the Instant Pot on “Yogurt” mode for 8-10 hours.
-
-
Oven Method:
-
Preheat your oven at its lowest setting.
-
Pour the mixture into oven-safe jars or containers.
-
Turn off the oven and place the jars with the instant pot yogurt starter inside, leaving the oven light on for warmth.
-
Let it sit undisturbed for 8-10 hours.
-
Troubleshooting Tips
Sometimes, despite following all the steps diligently in your instant pot yogurt recipe using a yogurt starter, issues like curdling or a runny consistency can occur. But fret not! Here are some troubleshooting tips to help you overcome these common problems.
-
Curdling: If your yogurt has curdled, it may be due to overheating during the initial milk heating process. To avoid this, make sure to heat the milk slowly and stir occasionally. You can also try using a lower heat setting.
-
Runny Consistency: If your yogurt turns out too runny, it might be because it didn’t incubate long enough. Increase the incubation time by an hour or two and check if that improves the consistency.
Remember that making yogurt is a trial-and-error process, and you’ll get better with each attempt. Don’t hesitate to experiment with different variations such as adding vanilla extract or sweeteners to customize your homemade vanilla yogurt according to your taste preferences.
Now that you have our step-by-step guide and troubleshooting tips at hand, go ahead and give making vanilla yogurt a try. Enjoy the satisfaction of creating a delicious and healthy treat right in your own kitchen!
Variations and Flavor Options for Homemade Vanilla Yogurt
Making your own vanilla yogurt opens up a world of possibilities to experiment with exciting variations and flavors. By adding fruits, nuts, or granola to your basic vanilla yogurt recipe, you can create a delightful treat that suits your taste preferences perfectly. Let’s dive into some creative ideas to enhance the flavor and variety of your homemade vanilla yogurt.
Explore Different Flavors
The options for instant pot yogurt recipe are endless. Here are some delicious suggestions to get you started.
-
Cinnamon: Sprinkle a pinch of cinnamon into your yogurt for a warm and comforting flavor that pairs well with the natural sweetness of vanilla.
-
Cocoa Powder: For all the chocolate lovers out there, add a spoonful of cocoa powder to transform your plain vanilla yogurt into a rich and indulgent treat.
-
Matcha Green Tea Powder: If you’re looking for a unique twist, incorporate matcha green tea powder into your yogurt for an earthy and vibrant flavor.
Experiment with Fruits, Nuts, and Granola
Adding fruits, nuts, or granola not only enhances the taste but also adds texture and visual appeal to your vanilla bean yogurt. Consider these options:
-
Fruits: Fresh berries like strawberries, blueberries, or raspberries bring bursts of tangy sweetness to every bite. Alternatively, try tropical fruits like mangoes or pineapples for a refreshing twist.
-
Nuts: Toasted almonds, walnuts, or pecans provide a satisfying crunch while complementing the creamy smoothness of the yogurt.
-
Granola: Sprinkle some crunchy granola on top to add layers of texture and make every spoonful more enjoyable.
Sweeten with Natural Sweeteners
To elevate the sweetness level in your homemade vanilla yogurt without relying solely on sugar, consider incorporating natural sweeteners. Here are a few options to experiment with:
-
Honey: Drizzle some honey over your yogurt for a luscious sweetness that pairs well with the vanilla flavor.
-
Maple Syrup: Add a touch of maple syrup to infuse your yogurt with a distinctive, caramel-like taste.
-
Agave Nectar: For those seeking a low-glycemic alternative, agave nectar offers a mild and delicate sweetness.
By using these natural sweeteners, you can enhance the overall taste profile of your vanilla yogurt while keeping it wholesome and nutritious.
Tasty toppings to enhance your homemade vanilla yogurt
Elevate the flavors of your homemade vanilla yogurt with delectable toppings like fresh berries or sliced bananas. These simple additions can transform a plain bowl of yogurt into a delightful and satisfying treat.
Adding fresh berries to your vanilla yogurt not only enhances the taste but also adds a burst of color and antioxidants. Whether it’s juicy strawberries, tangy blueberries, or sweet raspberries, the combination of creamy yogurt and vibrant fruit creates a perfect balance of flavors. You can mix different types of berries for added variety or stick to your favorite one. The choice is yours!
If you’re looking for some crunch in every bite, consider adding toasted coconut flakes or chopped almonds to your vanilla yogurt. Toasted coconut flakes add a tropical twist and provide a pleasant texture contrast against the smoothness of the yogurt. Similarly, chopped almonds bring a nutty flavor and an enjoyable crunch that takes your yogurt experience to another level.
For those who enjoy a touch of sweetness, drizzling honey over your vanilla yogurt is an excellent choice. The natural sweetness of honey complements the mild tanginess of the yogurt, creating a harmonious blend of flavors. Feel free to adjust the amount according to your preference; some may prefer just a light drizzle while others might want a generous amount.
Another flavorful option is sprinkling cinnamon over your vanilla yogurt. Cinnamon adds warmth and depth to the overall taste profile, making each spoonful more enticing than ever before. The aromatic spice pairs exceptionally well with the creamy base and brings out subtle hints of sweetness.
To make homemade vanilla yogurt, start by heating milk in a pot until it reaches 180°F (82°C). Remove from heat and let it cool down slightly before stirring in sugar and vanilla extract according to taste preference. Allow this mixture to cool further until it reaches around 110°F (43°C). Once cooled, whisk in Greek yogurt until well combined. Transfer the mixture into a clean container, cover it, and let it incubate in a warm spot for 6-8 hours or until desired thickness is achieved. Refrigerate before serving.
Health benefits of consuming homemade yogurt regularly
Incorporating homemade yogurt into your diet can have numerous health benefits. Let’s explore the advantages of regularly consuming this delicious and nutritious treat.
Improve digestion and support gut health
One of the key reasons to enjoy homemade vanilla yogurt is its probiotic content. Probiotics are live bacteria that provide a range of health benefits, particularly for our digestive system. Homemade yogurt contains high amounts of active cultures, which are beneficial bacteria that help maintain a healthy balance in our gut.
By introducing these active cultures into our digestive system through homemade yogurt consumption, we can enhance digestion and promote gut health. These friendly bacteria aid in breaking down food, improving nutrient absorption, and reducing gastrointestinal issues such as bloating and constipation.
Boost immunity and promote overall well-being
Homemade yogurt can also play a potential role in boosting immunity and supporting overall well-being. The active cultures present in this creamy delight have been linked to strengthening the immune system, helping to ward off infections and illnesses.
Regular consumption of homemade vanilla yogurt may contribute to increased resistance against harmful pathogens by enhancing the body’s natural defense mechanisms. This means fewer sick days and a stronger immune response to various diseases.
Furthermore, studies have shown that people who consume homemade yogurt regularly often experience improved overall well-being. This could be attributed to the vitamins, minerals, protein, and other essential nutrients found in this wholesome dairy product.
Versatility for different dietary needs
Another advantage of making your own vanilla yogurt at home is the ability to customize it according to your dietary preferences or restrictions. Whether you follow a specific diet like vegetarian or gluten-free or have certain food sensitivities or allergies, making homemade yogurt allows you full control over the ingredients used.
You can choose organic milk sources or opt for plant-based alternatives like almond milk or coconut milk. You can control the amount of sweetener added or even experiment with alternative sweeteners like honey or maple syrup.
Easy and cost-effective
Making homemade yogurt is not only beneficial for your health but also easy on your wallet. With just a few simple ingredients and minimal equipment, you can prepare a batch of creamy vanilla yogurt at home.
All you need is milk, active cultures (either from store-bought yogurt or specialized starter cultures), and some patience while the mixture ferments. This DIY approach saves you money compared to buying pre-packaged yogurts regularly, especially if you consume them frequently.
Enjoy your homemade vanilla yogurt!
Congratulations on making your very own delicious vanilla yogurt at home! By following the easy step-by-step guide and using the essential ingredients and equipment, you have successfully created a healthy and flavorful treat.
With homemade vanilla yogurt, the possibilities are endless. You can experiment with different variations and flavor options to suit your taste preferences. Whether you prefer a tangy twist or a sweeter sensation, there’s a combination that will satisfy your cravings.
To enhance your homemade vanilla yogurt even further, try adding some tasty toppings. Fresh fruits, crunchy granola, or a drizzle of honey can take your yogurt to the next level of yumminess. Get creative and mix and match toppings to discover your favorite combinations.
Apart from being incredibly delicious, consuming homemade yogurt regularly also offers numerous health benefits. It is packed with probiotics that promote good gut health and strengthen the immune system. It provides essential nutrients like calcium and protein for overall well-being.
Now that you’ve mastered the art of making vanilla yogurt at home, why not share this delightful treat with others? Invite friends over for a brunch or prepare small jars as thoughtful gifts. Spread the joy of homemade goodness while impressing everyone with your culinary skills.
Remember to store any leftover yogurt in an airtight container in the refrigerator to maintain its freshness. Homemade vanilla yogurt typically lasts for about one week when properly stored.
So what are you waiting for? Grab those ingredients and get ready to enjoy creamy, dreamy homemade vanilla yogurt whenever you crave it!
FAQs
1. Can I use low-fat milk instead of whole milk?
Yes, you can use low-fat milk if you prefer a lighter version of vanilla yogurt. However, keep in mind that using whole milk will result in a creamier texture.
2. How long does it take for the yogurt to set?
The time required for the yogurt to set can vary depending on factors such as room temperature and the specific culture used. On average, it takes around 8 to 12 hours for the yogurt to fully set.
3. Can I use a different flavoring instead of vanilla extract?
Absolutely! Feel free to experiment with other flavorings like almond extract, coconut extract, or even cocoa powder to create unique variations of homemade yogurt.
4. Can I use a yogurt maker instead of an Instant Pot?
Yes, you can use a yogurt maker instead of an Instant Pot. The process will be similar; just follow the instructions provided with your yogurt maker.
5. Is homemade yogurt cheaper than store-bought yogurt?
Making your own vanilla yogurt at home can be more cost-effective in the long run, especially if you consume it regularly. Plus, you have full control over the ingredients and flavors.
I hope these answers help! Enjoy your homemade vanilla yogurt adventure!