How to Grow Vanilla Beans in Florida: The Ultimate Guide
Did you know that you can grow vanilla beans, a flowering plant, right here in sunny Florida? Yes, you heard it right! The opportunity to cultivate these exquisite orchids, a type of flowering plant, is waiting for you. But before diving into the culture plants, let’s explore the benefits and challenges faced by growers when growing vanilla beans in this region.

Florida’s warm climate and abundant sunshine make it an ideal environment for nurturing vanilla orchids. The state’s rich history of vanilla cultivation adds cultural significance to this venture for growers looking to cultivate flowering plants.
So, if you’re wondering how to grow vanilla beans in Florida, look no further. In this guide for growers, we’ll walk you through the process of cultivating vanilla beans step by step. From selecting the right variety for your culture plants to providing proper care and maintenance, we’ve got you covered.
Recipe Cost Reducer
Commercial Bakery & Wholesale
Bean count reduction calculated based on vanillin potency ratio (1.8% vs 3.54%) to maintain identical flavor intensity.
Get ready to embark on a journey into the world of growing vanilla beans in Florida. Let’s explore this unique opportunity together and unlock the secrets of cultivating these precious cured beans right in your own backyard!
Creaminess ROI Calculator
Ice Cream & Gelato Makers
See how much more flavor intensity you get for the same budget.
$16.67
$4.94
Higher Vanillin Load (mg/L) is required in high-fat mixes (14%+) to ensure flavor perception.
The Vanilla Orchid: A Guide to Growing Vanilla Beans
The vanilla orchid, with its captivating life cycle and unique characteristics, offers an exciting opportunity for growers in Florida to cultivate their own vanilla beans. By understanding the different varieties suitable for Florida’s climate and mastering essential propagation techniques, you can successfully grow your own vanilla beans right at home. This process involves pollination of the orchid flowers by hand, as they do not have natural pollinators like bees or butterflies. Once pollinated, the vines of the orchid produce pods that eventually turn into delicious blackberries.
How to Grow Vanilla Beans in Florida | Understanding the Vanilla Orchid
The vanilla orchid, a species within the Orchidaceae family, is a fascinating plant known for its fragrant and flavorful seed pods, also referred to as vanilla beans. This vine-like plant has captured the taste buds of people worldwide through its pollination with flowers.
Understanding the lifecycle of vanilla orchids is crucial for their pollination and flower production. These perennial vines thrive in tropical climates like Florida’s, requiring warm environments with high humidity levels and indirect sunlight.
Selecting Healthy Plants for Successful Cultivation
To ensure a thriving crop of vanilla beans, selecting healthy plants for pollination is paramount. When purchasing vanilla orchids, look for robust specimens free from any signs of disease or pests. Inspect both the foliage and roots carefully before making your selection of vines for cuttings.

Consider choosing from different species of vanilla orchids available for cultivation in Florida’s climate. One popular variety is Vanilla planifolia, also known as Bourbon vanilla or flat-leaved vanilla. This species flourishes in warm temperatures and can tolerate partial shade.
Propagating Vanilla Orchids
Once you have obtained your desired vanilla orchid plants, you may want to propagate them further through cuttings or seeds. Propagation allows you to expand your collection of plants or replace older ones if needed. This process is crucial for ensuring efficient pollination, as it helps in the production of more vines and flowers.
Propagation by Cuttings
Propagating vanilla plants through cuttings involves taking a piece of stem from mature vanilla vines and encouraging it to develop roots. Here is a step-by-step guide on how to propagate vanilla bean plants.
-
Select a healthy stem with at least three nodes.
-
Make a clean cut just below a node of the vanilla vines, ensuring the cutting is around six to eight inches long. This technique is commonly used for propagating vanilla planifolia, also known as vanilla plants or vanilla bean plants.
-
Remove any leaves from the lower half of the cutting to ensure optimal growth for vines and vanilla plants, specifically vanilla bean plants (vanilla planifolia).
-
Dip the bottom end of the vanilla bean plant cutting in rooting hormone powder to enhance root development for the vines.
-
Plant the cutting of vines in a well-draining potting mix, burying it approximately two inches deep.
-
Place the pot with vanilla bean vines in a warm and humid environment with indirect light.
-
Mist the cutting regularly to maintain high humidity levels.
Propagation by Seeds
Alternatively, you can propagate vanilla orchids from seeds, although this method requires more time and patience:
-
Collect fresh vanilla orchid seeds from mature seed pods.
-
Clean the vanilla bean seeds thoroughly to remove any pulp or debris.
-
Soak the vanilla bean seeds in water for 24 hours before sowing them.
-
Prepare a seed tray filled with a moistened mixture of sphagnum moss, perlite, and vanilla bean.
-
Scatter the seeds evenly across the surface of the tray and lightly press them into the medium without covering them completely.
-
Cover the tray with plastic wrap or place it inside a propagator to create a humid environment.
-
Keep the temperature consistently warm, ideally between 75-85°F (24-29°C).
-
Optimal Conditions for Growing Vanilla Orchids in Southern Florida
Environmental Requirements
To successfully grow vanilla beans in southern Florida, it is crucial to understand and meet the specific environmental requirements necessary for the thriving of vanilla orchids. These plants thrive in high humidity and warm temperatures, making the subtropical climate of southern Florida an ideal location.

Temperature, Humidity, and Light Levels
Temperature plays a vital role in the growth and development of vanilla orchids. Ideally, the temperature should range between 70°F (21°C) to 95°F (35°C) during the day and remain above 60°F (15°C) at night. Consistency is key, as extreme temperature fluctuations can negatively impact plant health.
In addition to temperature, maintaining high humidity levels is essential for successful cultivation. Vanilla orchids prefer humidity levels around 80% or higher. To achieve this, consider using a humidifier or placing trays filled with water near your plants to increase moisture in the air.
Proper light levels are also crucial for optimal growth. Vanilla orchids thrive in bright but indirect sunlight. Placing them near east-facing windows or providing them with filtered light will help mimic their natural habitat while protecting them from direct sun exposure that could scorch their delicate leaves.

Soil Types, Drainage Considerations, and pH Levels
Choosing the right soil type is critical when cultivating vanilla beans. These orchids require well-draining soil that retains some moisture without becoming waterlogged. A mix of peat moss, perlite, and coconut coir can provide excellent drainage while still retaining enough moisture for healthy root development.
Maintaining a slightly acidic to neutral pH level between 6 and 7 is ideal for vanilla orchids. Regularly testing your soil’s pH level will allow you to make any necessary adjustments by adding organic matter or other suitable amendments.
Air Circulation for Disease Prevention
Proper air circulation is essential to prevent fungal diseases that can harm vanilla orchids. Good air movement helps reduce the risk of moisture buildup on leaves, which can lead to fungal infections. To promote airflow, consider using fans or placing the plants in locations with natural breezes.
Regularly inspect your plants for any signs of disease or pests and take immediate action if necessary. Promptly remove any infected or damaged parts to prevent further spread.
Essential Care Tips for Healthy Vanilla Orchid Plants
Master watering techniques that strike a balance between avoiding overwatering or underwatering your vanilla orchids.
Finding the right balance is crucial. Overwatering can lead to root rot and other fungal diseases, while underwatering can cause dehydration and stunted growth. To strike the perfect balance, follow these tips:
-
Observe the soil moisture: Before watering, check the moisture level of the soil by inserting your finger about an inch deep. If it feels dry, it’s time to water; if it’s still moist, hold off for a little longer.
-
Water thoroughly but infrequently: When you do water your vanilla orchids, make sure to thoroughly saturate the soil until water drains out from the bottom of the pot. However, avoid frequent watering as this can suffocate the roots.
-
Consider environmental factors: Factors such as temperature and humidity affect how often you should water your plants. In Florida’s warm climate, you may need to water more frequently during hot summer months compared to cooler seasons.
Understand the importance of fertilization schedules tailored to meet the nutritional needs of these plants.
Proper fertilization plays a vital role in promoting healthy growth and abundant blooms in vanilla orchids. Consider these guidelines when fertilizing your plants:
-
Choose a balanced fertilizer: Look for a fertilizer specifically formulated for orchids or choose a balanced formula with equal amounts of nitrogen (N), phosphorus (P), and potassium (K). This will provide essential nutrients without causing excessive leaf growth at the expense of flowers.
-
Follow a regular feeding schedule: During active growth periods (spring and summer), feed your vanilla orchids every two weeks using a diluted solution of fertilizer mixed according to package instructions. Reduce frequency during dormant periods (fall and winter) to once every four to six weeks.
-
Avoid overfertilization: While it’s important to provide adequate nutrients, avoid the temptation to overfertilize. Excessive fertilization can lead to salt buildup in the soil, which can damage the roots and hinder growth.
Learn how to identify common pests and diseases affecting vanilla orchids and implement appropriate control measures.
Even with proper care, vanilla orchids are susceptible to certain pests and diseases. Being able to recognize these issues early on allows for prompt treatment:
-
Common pests: Look out for aphids, mealybugs, spider mites, and scale insects. These pests can cause leaf discoloration, stunted growth, and overall decline in plant health. Treat infestations with insecticidal soap or neem oil spray following package instructions.
-
Diseases: Vanilla orchids may be prone to fungal infections such as root rot and black rot. Ensure proper drainage by using well-draining soil mixtures and pots with drainage holes. If you notice signs of disease, remove affected parts promptly and treat with a suitable fungicide.
Discover pruning practices that encourage optimal growth while maintaining a manageable plant size.
Pruning is essential for keeping your vanilla orchid plants healthy and promoting vigorous growth:
-
Remove dead or yellowing leaves: Regularly inspect your plants for any signs of dead or yellowing leaves.
Repotting Vanilla Orchid Vines for Better Growth
Recognizing signs indicating when it is time to repot your matured vanilla orchid vines is crucial for their continued growth and health. As the vines grow, they may outgrow their current pot or exhibit certain indicators that they require repotting. Look out for crowded roots, stunted growth, or if the plant becomes too heavy for its container.
To safely remove old potting media without damaging delicate roots, follow these step-by-step instructions. Begin by carefully lifting the vanilla vine from its current pot, taking care not to disturb the aerial roots. Gently shake off excess soil and examine the root system. If you notice any rotting or damaged roots, trim them with sterile shears before proceeding further.
Next, select a suitable container with proper drainage for repotting your vanilla orchids. A container that is slightly larger than the previous one will provide ample space for root expansion while preventing excessive moisture retention. Opting for a breathable material like terracotta can help regulate moisture levels effectively.
During and after repotting, providing support structures for climbing vines is essential to ensure healthy growth. Vanilla orchids are natural climbers and rely on sturdy supports to thrive. Consider using trellises or stakes made of bamboo or other organic materials that won’t harm the delicate aerial roots.
When selecting a new potting mix, choose one specifically formulated for epiphytic plants like vanilla vines. These mixes usually consist of a combination of well-draining materials such as bark chips, sphagnum moss, and perlite to promote optimal root health and prevent issues like fusarium fungus.
Proper watering techniques are vital when caring for repotted vanilla orchids. After repotting, give the plant a thorough watering until water drains freely from the bottom of the pot. Subsequently, maintain regular watering intervals while allowing the top layer of soil to dry between waterings. Avoid overwatering, as it can lead to root rot and hinder growth.
As the vanilla orchid’s terrestrial roots develop, they will anchor the plant securely in its new pot. Over time, these roots will absorb nutrients from the potting mix and contribute to healthy growth. Monitor their progress by periodically checking for new root growth and adjusting watering schedules accordingly.
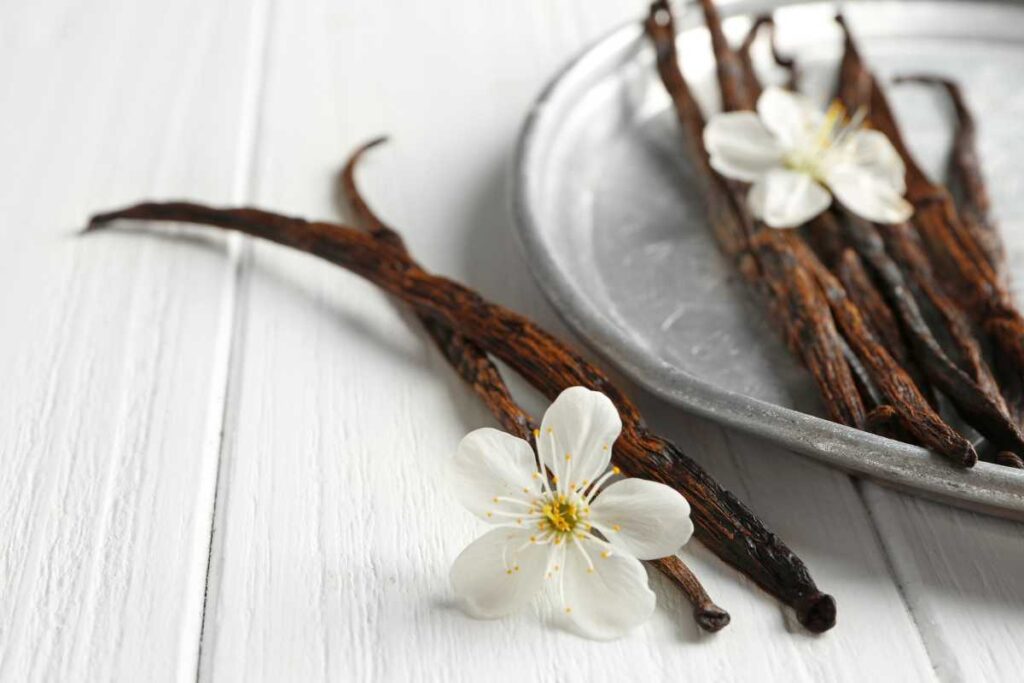
Harvesting and Curing: Preserving the Flavorful Bounty of Homegrown Vanilla Beans
Growing your own vanilla beans in Florida can be a rewarding experience. Not only do you get to enjoy the delicious flavor and aroma of fresh vanilla, but you also have the satisfaction of knowing that you cultivated it yourself. In order to make the most out of your vanilla cultivation, it is important to understand the process of harvesting and curing the beans.
Determining the Ideal Time for Harvesting
Knowing when to harvest your vanilla beans is crucial for achieving optimal flavor and quality. Visual cues and aroma play a significant role in determining if the beans are ready. Look for plump, mature beans with a glossy appearance. They should have turned yellow or brownish-yellow, depending on the variety. A strong sweet fragrance emanating from the beans indicates ripeness.
Hand-Pollination for Maximum Bean Production
To ensure a bountiful harvest, hand-pollination is often necessary when growing vanilla beans in Florida. Vanilla orchids rely on specific pollinators found in their native habitat, which may not be present in your garden. To hand-pollinate, gently lift up each flower’s flap-like lip using a toothpick or small brush and transfer pollen from one flower to another. This process mimics natural pollination and stimulates bean production.
Effective Methods for Curing Freshly Harvested Vanilla Beans
Curing is an essential step in maximizing the flavor and aroma of freshly harvested vanilla beans. Once harvested, carefully wash them under running water to remove any dirt or debris. Next, blanch the beans by dipping them into boiling water for 3-4 minutes before immediately transferring them into ice-cold water to stop cooking.
After blanching, lay out the beans on clean paper towels or drying racks to dry them thoroughly. It is important to maintain proper humidity levels during this stage by placing them in a well-ventilated area with moderate humidity. This process typically takes several weeks, during which the beans will gradually turn dark brown and become pliable.
Storage Techniques for Maintaining Quality and Longevity
Proper storage is crucial to preserve the quality and longevity of your cured vanilla beans. Once completely dried, store them in airtight containers, such as glass jars or vacuum-sealed bags. It is recommended to keep them in a cool, dark place away from direct sunlight and extreme temperature fluctuations.
To enhance their flavor over time, consider storing the beans alongside other aromatic ingredients like cinnamon sticks or citrus peels. This allows the vanilla beans to absorb additional flavors while maintaining their own distinct aroma.
DIY Vanilla Extract: Creating Your Own Flavorful Elixir at Home
Making your own homemade vanilla extract is a rewarding and delicious endeavor. Whether you’re an avid baker or just love the rich, aromatic flavor of vanilla, creating your own natural vanilla extract allows you to infuse your recipes with a genuine and authentic taste. With a few simple ingredients and some patience, you can produce a flavorful elixir that will elevate your culinary creations to new heights.
Types of Alcohol for Extracting Flavors
Choosing the right alcohol is crucial. The most popular choice is vodka due to its neutral taste, which allows the true essence of the vanilla bean to shine through. However, there are other options available if you prefer a different flavor profile.
-
Rum: Using rum can add a subtle sweetness and complexity to your homemade vanilla extract.
-
Bourbon: Bourbon imparts a rich and smoky undertone that pairs well with desserts like chocolate cake or pecan pie.
-
Brandy: Brandy adds depth and warmth to the flavor profile of the extract.
Experimenting with different alcohols can result in unique variations of homemade vanilla extract that cater to your personal preferences.
Recipes for Personalized Vanilla Extracts
Creating your own personalized vanilla extract is as simple as combining alcohol and fresh or cured vanilla beans in a glass jar. Here’s a basic recipe you can follow:
-
Gather your ingredients: 8 ounces of alcohol (such as vodka), 5-6 fresh or cured vanilla beans.
-
Split each vanilla bean lengthwise using a sharp knife.
-
Place the split beans into a clean glass jar.
-
Pour the alcohol over the beans until they are fully submerged.
-
Seal the jar tightly and give it a good shake.
-
Store the jar in a cool, dark place for at least 6-8 weeks, shaking it occasionally.
During this time, the alcohol will extract the flavor compounds from the vanilla beans, resulting in a rich and aromatic homemade vanilla extract. The longer you let it sit, the more intense the flavor will become. Once ready, strain out the beans and transfer the liquid to a clean bottle for easy use.
Storing and Using Homemade Vanilla Extract
Proper storage is essential to maintain the freshness and potency of your homemade vanilla extract. Here are some tips to ensure its longevity:
-
Keep your vanilla extract in a tightly sealed bottle or jar to prevent evaporation.
-
Store it in a cool, dark place away from direct sunlight.
-
Avoid exposing it to heat or extreme temperature changes.
Now that you have your homemade vanilla extract ready, it’s time to put it to good use! This versatile ingredient can be used in various culinary applications, including:
-
Baking: Add a splash of homemade vanilla extract to your favorite cookie dough or cake batter for an elevated burst of flavor.
-
Beverages: Mix into coffee, hot chocolate, or smoothies for an extra touch of sweetness and aroma.
-
Sauces and Dressings: Enhance savory dishes like barbecue sauce or salad dressings with a hint of real vanilla.
The possibilities are endless. Get creative and enjoy experimenting with this beloved flavor!
Conclusion
Congratulations! You are now equipped with the knowledge and skills to master the art of growing vanilla beans in Florida. By following the guidelines outlined in this guide, you can create a thriving vanilla orchid garden right in your own backyard.
Throughout this guide, we have covered essential topics such as understanding the vanilla orchid and its requirements, creating optimal conditions for growth, providing proper care to ensure healthy plants, repotting techniques for better growth, and finally harvesting and curing your homegrown vanilla beans. We explored how you can take your love for vanilla even further by creating your very own DIY vanilla extract.
Now it’s time to put all this valuable information into action. Get started on your journey to becoming a successful vanilla bean grower in Florida today!
Remember that success with growing vanilla beans requires patience and dedication. Don’t be discouraged if you encounter challenges along the way. With practice and experience, you will become more proficient in nurturing these delicate plants.
To further enhance your learning experience, consider joining local gardening communities or online forums where you can connect with fellow enthusiasts who share your passion for growing vanilla beans. These platforms provide an opportunity to exchange tips, troubleshoot issues together, and celebrate successes.
So go ahead and embrace this exciting venture of cultivating flavorful homegrown vanilla beans. Soon enough, you’ll be enjoying the fruits of your labor – delicious homemade treats infused with the rich aroma of pure vanilla goodness!
FAQs
Can I grow vanilla beans indoors?
Yes! Vanilla beans can be grown indoors as long as they receive adequate sunlight or artificial lighting equivalent to natural sunlight. Ensure proper ventilation and humidity levels within the indoor environment to mimic their native tropical habitat.
How long does it take for a vanilla orchid plant to produce beans?
Patience is key when growing vanilla orchids. It typically takes around three to five years before a plant reaches maturity and starts producing flowers that eventually develop into vanilla beans.
Can I grow vanilla beans in other parts of Florida?
While the optimal conditions for growing vanilla beans are found in southern Florida, it is possible to cultivate them in other regions of the state. However, you may need to make adjustments to accommodate different climate and soil conditions.
How often should I water my vanilla orchid plants?
Watering frequency depends on various factors such as temperature, humidity, and season. As a general rule, water your vanilla orchids thoroughly when the top inch of soil feels dry but avoid overwatering as it can lead to root rot.
Are there any pests or diseases that affect vanilla orchids?
Yes, like any plant, vanilla orchids can be susceptible to pests and diseases. Common pests include spider mites and aphids, while fungal infections such as black rot and root rot can also occur. Regular inspection and proper care can help prevent or address these issues promptly.