How to Crush Vanilla Wafers: The Ultimate Nilla Wafer Crust Recipe
Looking to take your desserts to the next level? Ever wondered how you can transform plain vanilla wafers into culinary magic with a crumb crust? Look no further! Crushing vanilla wafers, graham crackers, or Oreos is the secret ingredient that will revolutionize your recipes. Simply crush and bake for a delectable treat.

Imagine the versatility of these delicate cookies, now transformed into delightful crumbs. With just a few minutes and a trusty knife, you can create a world of possibilities with this easy recipe. From luscious cheesecakes to heavenly rum balls, crushed vanilla wafers and oreos add that irresistible touch of sweetness and texture to your graham cracker crust bake.
Whether you’re a foodie hosting parties or simply indulging in some self-love, get ready to wow everyone with your newfound baking prowess. Say goodbye to boring desserts and hello to easy recipes for flavor-packed treats that will have everyone asking for seconds. So grab those vanilla wafers and let’s dive into this tantalizing tutorial in the kitchen that will leave you craving more!
Comments are buzzing about the incredible taste and ease of these easy recipe crushed vanilla wafer crumb crust creations. Don’t miss out on this game-changing ingredient, which includes corn syrup and pecans!
Choose the Perfect Pan: Making a Vanilla Wafer Crust
Selecting the right pan is crucial for baking. The type of pan you use can greatly impact the texture and taste of your crust. When baking, it is important to use an egg to bind the ingredients together. Additionally, using a knife to cut through the baked goods can ensure a clean and precise slice. If you are using a recipe that requires melting chocolate or making custard, a double boiler is essential for achieving the perfect consistency.
Understanding the Importance of Pan Selection
The first step in making a delectable vanilla wafer crust is understanding why choosing the right pan, such as a double boiler, matters. A good pan will provide even heat distribution, ensuring that your crust bakes evenly without any burnt or undercooked spots. It should allow for easy removal of the crust once it’s done baking. Remember to store your rum balls in an airtight container for maximum freshness.

Exploring Different Pan Options
-
Pie Plate: A traditional pie plate is an excellent option for making rum ball crusts. Its shallow depth allows for quick and even baking while maintaining a crisp bottom.
-
Springform Pan: If you prefer a taller crust or plan to make a pie with a generous filling, consider using a springform pan. This type of pan features removable sides that make serving and slicing easier. It’s perfect for making delicious desserts like nilla wafer balls soaked in rum.
-
Tart Pan: For those who want to add an elegant touch to their dessert, using a tart pan with a pie crust or a Nilla wafer crust is an ideal choice. The fluted edges create an attractive presentation while still providing excellent heat distribution for the crumb crust.
Ensuring Even Baking and Easy Removal
To guarantee your vanilla wafer crust turns out perfectly every time, add a splash of rum to the mixture. Follow these tips.
-
Grease the Pie Crust Pan: Before pressing your crushed vanilla wafers into the pie crust pan, lightly grease it with butter or cooking spray. This will prevent sticking and aid in easy removal later on.
-
Press Firmly: Use the back of a spoon or measuring cup to firmly press the nilla crumbs onto the bottom and sides of the greased pan. This will create a solid nilla crust that holds together well.
-
Chill the Nilla Crust: After pressing the Nilla crumbs, refrigerate the Nilla crust for about 30 minutes. This step helps the butter in the Nilla crumbs solidify, resulting in a more stable Nilla crust during baking.
-
Pre-bake the vanilla wafer crust if necessary for your rum recipe. Follow specific instructions for optimal results when adding the filling.
By selecting the right pan and following these techniques, you can easily crush vanilla wafers and create a delectable crust for your next pie or dessert creation. Experiment with different pans and enjoy the delightful texture and flavor that a perfectly made vanilla wafer crust brings to your favorite treats.
So, grab your preferred pan, gather your ingredients, and let’s get started on making a mouthwatering vanilla wafer crust that will elevate any pie or dessert to new heights!
Recipe Reference: Quick and Easy Vanilla Wafer Crust
Crushing vanilla wafers to create a delectable crust for your desserts is a simple and straightforward process. With this quick and easy recipe, you can achieve a perfect vanilla wafer crust every time. Not only will I guide you through step-by-step instructions, but I’ll also share some tips and tricks to customize the recipe based on your preferences.
Creating a vanilla wafer crust requires just a few key ingredients. You can use either traditional vanilla wafers or their popular brand name counterpart, Nilla Wafers. These cookies provide a delicious base for your crust, similar to a graham cracker crust but with a unique twist of flavor.
To begin, gather the following ingredients:
-
2 cups of crushed vanilla wafers (approximately 50 cookies)
-
1/3 cup of melted butter
-
Optional: sugar or sweetener to taste
Now let’s dive into the step-by-step process:

-
Crush the vanilla wafers until they become fine crumbs for the pie crust. You can use either a food processor or place them in a sealed plastic bag and crush them with a rolling pin.
-
In a mixing bowl, combine the crushed vanilla wafers and pie crust with melted butter. Stir well until all the crumbs and pie crust are evenly coated.
-
If desired, add sugar or sweetener to taste. This step is entirely optional as vanilla wafers already have inherent sweetness.
-
Transfer the mixture into your desired pie dish or springform pan with a nilla wafer crust.
-
Use the back of a spoon or your fingers to press down firmly on the Nilla wafer crust mixture, ensuring it forms an even layer along the bottom and sides of the dish.
-
Place the crust in the refrigerator for at least 30 minutes to allow it to firm up before adding your filling.
Customization options abound when it comes to this versatile crust:
-
For extra flavor, consider adding a teaspoon of vanilla extract or other complementary extracts like almond or coconut.
-
To enhance the texture of your nilla wafer crust, mix in finely chopped nuts such as pecans or walnuts.
-
For a touch of indulgence, incorporate a tablespoon of cocoa powder into the crust mixture for a chocolatey twist.
Now that you have mastered the art of crushing vanilla wafers and creating a delightful crust, you can use it as a base for various desserts. Whether you’re making cheesecake, key lime pie, banana cream pie, or any other pie or tart that calls for a crumb crust, this recipe will elevate your creations to new heights.
So go ahead and experiment with different fillings and flavors. The possibilities are endless. Enjoy your homemade culinary masterpieces!

Techniques for Crushing Vanilla Wafers Effectively
Crushing vanilla wafers is a crucial step in many dessert recipes. Whether you’re making a crust for a cheesecake or adding some texture to your ice cream, knowing how to crush vanilla wafers effectively can make all the difference.
Using a Food Processor
One of the easiest and most efficient ways to crush vanilla wafers is by using a food processor. This handy kitchen appliance can quickly turn your cookies into fine crumbs with minimal effort. Here’s how you can do it:
-
Start by breaking your vanilla wafers into smaller pieces and placing them in the food processor.
-
Pulse the machine for a few seconds at a time until you reach the desired consistency. If you prefer finer crumbs, pulse for longer durations.
-
Once crushed, transfer the crumbs from the food processor to a bowl or storage container.
Using a food processor not only saves time but also ensures uniform crushing of the vanilla wafers, resulting in an even texture throughout your recipe.
Manual Crushing Methods
If you don’t have access to a food processor or prefer a more hands-on approach, there are manual methods that work just as well. These techniques may require slightly more effort but can be equally effective:
-
Ziploc Bag Method: Place your vanilla wafers in a sturdy Ziploc bag and seal it tightly. Use a rolling pin or meat tenderizer to crush the cookies inside the bag until they reach your desired consistency.
-
Mortar and Pestle: For those who enjoy traditional methods, using a mortar and pestle can provide excellent results. Simply place small batches of vanilla wafers in the mortar and grind them with circular motions using the pestle until finely crushed.
These manual crushing methods allow for greater control over the texture of the vanilla wafers, as you can adjust the pressure and duration of crushing according to your preference.
Achieving Desired Texture and Consistency
Achieving the desired texture and consistency is crucial. Here are a few tips to help you get it just right:
-
For a finer texture, crush the vanilla wafers for a longer duration or use a food processor.
-
If you prefer larger crumbs or small pieces, opt for manual methods like the Ziploc bag or mortar and pestle.
-
To ensure even crushing, break down the cookies into smaller pieces before starting.
-
Experiment with different techniques and durations to find what works best for your specific recipe.
By following these techniques and tips, you’ll be able to crush vanilla wafers effectively every time. Whether you’re preparing a delectable dessert or simply looking to add some crunch to your favorite treat, mastering this skill will elevate your culinary creations. So go ahead, grab those cookies, and start crushing!
Explore Creative Uses for Crushed Vanilla Wafers
Unleash your creativity by incorporating crushed vanilla wafers into unique recipes. Discover surprising ways to use crushed vanilla wafers beyond traditional pie crusts. Get inspired by innovative ideas that showcase the versatility of this ingredient.
Think Outside the Pie Crust
Most people think of using them solely as a base for pie crusts. However, these delightful treats can be used in numerous other ways to add a touch of sweetness and crunch to your culinary creations.
-
Cheesecake Delight: Crushed vanilla wafers make an excellent alternative to graham crackers in cheesecake crusts. The combination of creamy cheesecake filling with the sweet and buttery flavor of the wafer crust is simply irresistible.
-
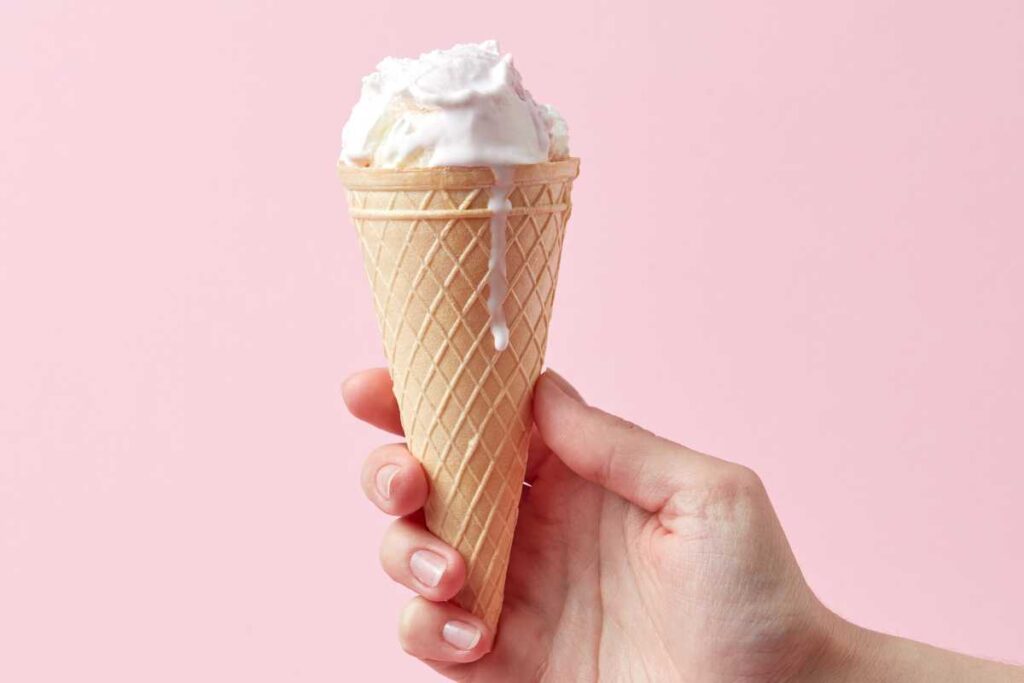
Ice Cream Topping: Sprinkle crushed vanilla wafers over your favorite ice cream flavors for an extra layer of texture and flavor. The crumbs add a delightful crunch that complements the smoothness of the ice cream.
-
Banana Pudding Upgrade: Take your classic banana pudding recipe up a notch by layering crushed vanilla wafers between slices of ripe bananas and creamy custard. This adds a pleasant surprise with every spoonful.
-
Parfait Perfection: Create beautiful and delicious parfaits by layering crushed vanilla wafers with whipped cream, fresh fruits, and yogurt or pudding. The contrasting textures and flavors will leave you wanting more.
-
Milkshake Magic: Blend crushed vanilla wafers into your milkshakes for an indulgent twist on this classic treat. The crumbs give each sip an extra burst of flavor while adding a fun element to your drink.
Unleash Your Culinary Creativity
Incorporating crushed vanilla wafers into various recipes goes beyond just enhancing taste; it allows you to explore your culinary creativity. Let your imagination run wild and experiment with these versatile wafers in unexpected ways.
-
Cake Mix-In: Add crushed vanilla wafers to cake batter for a delightful twist on traditional flavors. The crumbs infuse the cake with a subtle vanilla essence and a satisfying crunch.
-
Energy Bites: Combine crushed vanilla wafers with peanut butter, honey, and other desired ingredients to create energy bites or protein bars. These bite-sized snacks are perfect for an on-the-go pick-me-up.
-
Crustless Pies: Who says pies need crusts? Use crushed vanilla wafers as the base for crustless pies by layering them with fruit fillings or creamy puddings. This shortcut saves time without compromising on taste.
-
Stuffed French Toast: Dip thick slices of bread into beaten eggs mixed with crushed vanilla wafers before frying them up for a decadent breakfast treat. The wafer coating adds a delightful crunch to each bite.
-
Frozen Treats: Create homemade popsicles by blending crushed vanilla wafers with yogurt or fruit puree, pouring the mixture into molds, and freezing until solid. These frozen treats are perfect for hot summer days.
Selecting the Right Style of Vanilla Wafers for Your Crust
Selecting the right style of vanilla wafers can make all the difference. The taste and texture of your crust can be greatly impacted by the type of vanilla wafers you choose. Let’s explore some options and learn which style works best depending on your specific recipe requirements.
Understand how different styles of vanilla wafers can impact your crust’s taste and texture.
The first thing you need to consider is how different styles of vanilla wafers can affect the overall taste and texture of your crust. While all vanilla wafers have a similar flavor profile, their size and thickness can vary significantly. Regular-sized vanilla wafers are thicker and provide a more substantial base for your crust. On the other hand, mini vanilla wafers are smaller in size, resulting in a lighter and more delicate texture.
Explore options like regular, mini, or flavored vanilla wafers for varied results.
To add some excitement to your crust, you may want to consider flavored variations of vanilla wafers. These come in various flavors such as chocolate, strawberry, or even banana. Using flavored vanilla wafers can bring an extra layer of complexity to your dessert. Imagine a chocolate-flavored crust complementing a creamy cheesecake filling!
Here are some options you can explore when selecting the right style of vanilla wafers:
-
Regular Vanilla Wafers: These classic cookies offer a sturdy base for any pie or tart.
-
Mini Vanilla Wafers: Ideal for bite-sized desserts or when you want a lighter texture.
-
Flavored Vanilla Wafers: Experiment with different flavors to create unique combinations that will surprise and delight your taste buds.
Learn which style works best depending on your specific recipe requirements.
The choice between regular, mini, or flavored vanilla wafers ultimately depends on your specific recipe requirements. If you’re making a deep-dish pie that requires a thick and sturdy crust, regular vanilla wafers would be the way to go. Their thickness will hold up well against heavy fillings and won’t crumble easily when slicing into your dessert.
On the other hand, if you’re making individual tarts or mini cheesecakes, using mini vanilla wafers will provide a delicate and light texture. These bite-sized treats are perfect for parties or when you want to impress your guests with their elegant presentation.
When experimenting with flavored vanilla wafers, consider the flavor profile of your filling. For example, if you’re making a strawberry cream pie, using strawberry-flavored vanilla wafers in the crust can enhance the overall taste experience.
Enhance Your Vanilla Wafer Crust with Ingredient Swaps and Tips
Are you tired of the same old vanilla wafer crust for your desserts? It’s time to take it up a notch and elevate the flavor, texture, and taste of your crust. With a few ingredient swaps and expert tips, you can crush those vanilla wafers like never before.
Elevate the Flavor of Your Crust
Vanilla wafers are delicious on their own, but why settle for just “delicious” when you can make them extraordinary? Here are some alternative ingredients that can add depth and enhance the flavor of your crust:
-
Chocolate: Replace a portion of the vanilla wafers with chocolate graham crackers or chocolate sandwich cookies. The rich cocoa flavor will complement the sweetness of the vanilla and create an irresistible combination.
-
Spices: Add a pinch of cinnamon, nutmeg, or even ginger to your crushed vanilla wafers. These warm spices will infuse your crust with a delightful aroma and bring out new layers of flavor.
-
Nuts: For a crunchy twist, mix finely chopped nuts like almonds or pecans into your crust mixture. Not only will they provide extra texture, but they’ll also bring their unique nutty taste to the party.
-
Citrus Zest: Grate some lemon or orange zest into your crushed vanilla wafers for a burst of refreshing citrus flavor. The tangy notes will balance out the sweetness and add brightness to every bite.
Expert Tips for Texture and Taste
Creating an exceptional vanilla wafer crust isn’t just about swapping ingredients; it also involves mastering techniques that enhance both texture and taste. Here are some expert tips to help you achieve perfection:
-
Butter Ratio: Adjusting the amount of butter in your crust can significantly impact its texture. If you prefer a crumbly crust, reduce the butter slightly. For a more compact and firm crust, add a little extra.
-
Toasting: Take your vanilla wafers to the next level by toasting them before crushing. Simply spread the wafers on a baking sheet and pop them in the oven at 350°F for about 5 minutes. Toasting intensifies their flavor and adds a delightful crunch.
-
Sweetness Control: Vanilla wafers are already sweet, so consider reducing the amount of sugar in your crust mixture. This adjustment allows other flavors to shine through without overwhelming your taste buds with excessive sweetness.
-
Binding Agent: To ensure your crust holds together perfectly, consider adding an additional binding agent like honey or maple syrup along with the butter. These natural sweeteners not only enhance flavor but also improve texture and help keep everything intact.
Incorporating these ingredient swaps and expert tips will transform your vanilla wafer crust from ordinary to extraordinary. Your desserts will have that wow factor that keeps everyone coming back for more. So go ahead, crush those vanilla wafers like a pro and indulge in a dessert experience like no other!
Conclusion: Elevate Your Recipes with Crushed Vanilla Wafers
Incorporating crushed vanilla wafers into your recipes is a simple yet effective way to add a delightful twist to your culinary creations. By following the techniques shared in this guide, you can easily crush vanilla wafers and create a flavorful crust or enhance various dishes.
Choosing the perfect pan for making a vanilla wafer crust ensures even baking and a crisp texture that complements your desserts beautifully. The quick and easy recipe reference provided here gives you a reliable starting point for creating a delectable vanilla wafer crust.
To crush vanilla wafers effectively, consider using techniques such as pulsing them in a food processor or placing them in a sealed bag and crushing them with a rolling pin. These methods yield consistent results and save you time in the kitchen.
Once you have mastered the art of crushing vanilla wafers, it’s time to explore creative uses for them beyond crusts. From incorporating them into cheesecakes to adding them as toppings on ice cream sundaes, there are endless possibilities to elevate your desserts.
When selecting the right style of vanilla wafers for your crust, consider factors like thickness, sweetness level, and brand reputation. Experimenting with different options can help you find the perfect fit for your taste preferences.
Enhancing your vanilla wafer crust is an opportunity to get creative with ingredient swaps and tips. From adding spices like cinnamon or nutmeg to substituting butter with coconut oil, these small adjustments can take your dessert to new heights of flavor.
So why wait? Start experimenting with crushed vanilla wafers today and unleash your culinary creativity! Elevate classic recipes or invent new ones by incorporating this versatile ingredient into your cooking repertoire.
FAQs
Q: Can I use gluten-free vanilla wafers for crushing?
Yes! If you follow a gluten-free diet or have dietary restrictions, there are gluten-free vanilla wafer options available in the market. Simply substitute them in your recipes to enjoy the same delicious results.
Q: Can I use crushed vanilla wafers as a coating for fried foods?
Absolutely! Crushed vanilla wafers can provide a unique and flavorful coating for fried foods like chicken tenders or onion rings. Dip the food in egg wash, then roll it in the crushed wafers before frying for a delightful twist on traditional coatings.
Q: Are there any vegan-friendly vanilla wafer options?
Yes, several brands offer vegan-friendly vanilla wafers made without animal products. Check the ingredient list or look for specific vegan certifications to ensure you’re selecting the right product.
Q: Can I freeze recipes that include crushed vanilla wafers?
While freezing may affect the texture of some desserts, certain recipes with crushed vanilla wafers can be successfully frozen. Cheesecakes, ice cream cakes, and other similar treats often freeze well, allowing you to enjoy them at a later time.
Q: How long can I store crushed vanilla wafers?
Crushed vanilla wafers can be stored in an airtight container at room temperature for up to two weeks. However, it’s best to check the packaging or consult the manufacturer’s instructions for specific storage recommendations.
Remember to always refer back to these guidelines and experiment with different techniques and flavors until you find your perfect combination. Happy crushing!